Ortelius Blog
Topics include Supply Chain Security, Vulnerability Management, Neat Tricks, and Contributor insights.
How to Bake an Ortelius Pi Part 1 | The Hardware

- Introduction
- My Home Setup
- NFS Storage
- Raspberry Pi Imaging Utility for the Ubuntu 22.04 LTS x64 OS installation
- Preparing the OS for installation
- Using the Raspberry Pi Imager
- Conclusion
- Next Steps
Introduction
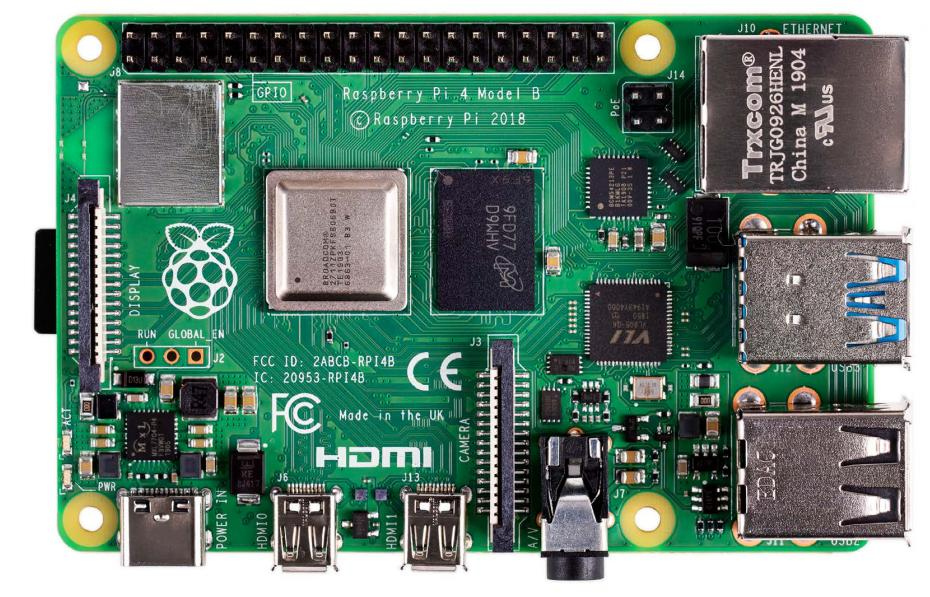
I recently started building a Cloud Native Environment on three Raspberry Pi 4 B’s with a Synology DS413j NAS (ARMv5 architecture) running the latest firmware update DSM 6.2.4-25556 Update 7 Release Notes and so far its been quite a journey. In this blog post I would like to share my undertakings in a series of blog posts.
Raspberry Pi 4 B’s pack a punch with a Broadcom Quad Core ARMv8 processor and 8 GB ram. They are very light on electricy thus saving on cost and only require a single small UPS (uninterruptable power supply) to stay online. They are very mobile and take up extremely little space in my man cave.
My Home Setup
- 3X Raspberry Pi4 Model B 8GB Red/White Official Case Essentials Kit Boxed White Power Supply
- Please go to this link for the full hardware specs Raspberry Pi 4 B
Use this article from Toms Hardware for microSD card benchmarking. I can also recommend Jeff Geerling for all things Raspberry Pi.
- 3X 32GB Samsung Evo+ microSD Card (UHS-II: theoretical maximum transfer speeds up to 312MB/s)
OR
-
3X 32GB USB 3 flash drives but this comes with some caveats performance wise which I will discuss further on
-
1X Screen HDMI
-
1X Keyboard USB
-
1X 8 Port Switch
-
Networking | Use DHCP or static IP addresses in a private range.
-
1X UPS (Uninterruptable Power Supply) for the Pis and switch | Something like this Mecer 650VA. Please note this is a South African brand of UPS but I am showing this for example purposes. The Mecer brand is extremely good and all my lead acid battery UPS’s are from Mecer. I have a combination of the 650VA, 2000VA and 3000VA to keep me going (7 in all)
NFS Storage
- What is network-attached storage (NAS)?
- What is NFS?
- 1X NAS device for the NFS storage which can be a virtual machine, laptop, old desktop or Synology type device. There are plenty options out there just do a internet search.
- 1X 650VA UPS
Raspberry Pi Imaging Utility for the Ubuntu 22.04 LTS x64 OS installation
The imaging utility will be used to install Ubuntu onto your SD Card or USB flash drive.
- Raspberry Pi imaging Utility
- Ubuntu Server 22.04 LTS x64 for Raspberry Pi
- MacOS install with Brew package manager
brew install raspberry-pi-imager - Windows install here
Preparing the OS for installation
- Install Raspi-Config on each Ubuntu server
sudo apt install raspi-config -y
USB 3 flash drives
If you use USB flash drives you will need to do the following as mentioned in this post. It all comes down to the implementation of the UAS specification.
- In the article the author says to go here
/boot/cmdline.txtbut on my Pi4 I had to go here/boot/firmware/cmdline.txt - A Pi has no BIOS so this is how you configure a Pis BIOS by editing
/boot/firmware/cmdline.txt - Install dmesg
sudo apt install dmesg -y - Raspi-Config allows you to configure your Pis hardware without having to fiddle with
/boot/firmware/cmdline.txt - Run Raspi-Config like this
sudo raspi-configand you will get a screen like this

- Use Raspi-Config to configure boot order, enable or disable read-only filesystem and many other tweaks
- I found it much easier just to use the right microSD Card and skip all this but it was still a good learning curve
Example from configuring my Pi to use USB flash sticks
- You will need to do this for each Pi
- As you can see I was using a 32GB Lexmark USB flash stick
Lexmark 32GB USB
Product: USB Flash Drive
[    2.885515] usb 2-2: Manufacturer: Lexar
[    2.885527] usb 2-2: SerialNumber: AA0G3FCUYDI06HNV
[    3.007270] usb 1-1: new high-speed USB device number 2 using xhci_hcd
[    3.157900] usb 1-1: New USB device found, idVendor=2109, idProduct=3431, bcdDevice= 4.21
[    3.157922] usb 1-1: New USB device strings: Mfr=0, Product=1, SerialNumber=0
- Getting your USB flash drives details
sudo dmesg | grep usb-storage
[    0.000000] Kernel command line: coherent_pool=1M 8250.nr_uarts=1 snd_bcm2835.enable_compat_alsa=0 snd_bcm2835.enable_hdmi=1 bcm2708_fb.fbwidth=1600 bcm2708_fb.fbheight=900 bcm2708_fb.fbswap=1 smsc95xx.macaddr=DC:A6:32:B1:5D:DF vc_mem.mem_base=0x3eb00000 vc_mem.mem_size=0x3ff00000  usb-storage.quirks=05dc:a838:u cgroup_enable=memory cgroup_memory=1 console=ttyS0,115200 dwc_otg.lpm_enable=0 console=tty1 root=LABEL=writable rootfstype=ext4 rootwait fixrtc quiet splash
[    2.958568] usb-storage 2-2:1.0: USB Mass Storage device detected
[    2.958964] usb-storage 2-2:1.0: Quirks match for vid 05dc pid a838: 800000
[    2.959059] scsi host0: usb-storage 2-2:1.0
[    2.959390] usbcore: registered new interface driver usb-storage
usb-storage.quirks=05dc:a838:u
- Pi01’s BIOS config at
/boot/firware/cmdline.txtaka Pi 4 BIOS file
usb-storage.quirks=05dc:a838:u cgroup_enable=memory cgroup_memory=1 console=serial0,115200 dwc_otg.lpm_enable=0 console=tty1 root=LABEL=writable rootfstype=ext4 rootwait fixrtc quiet splash
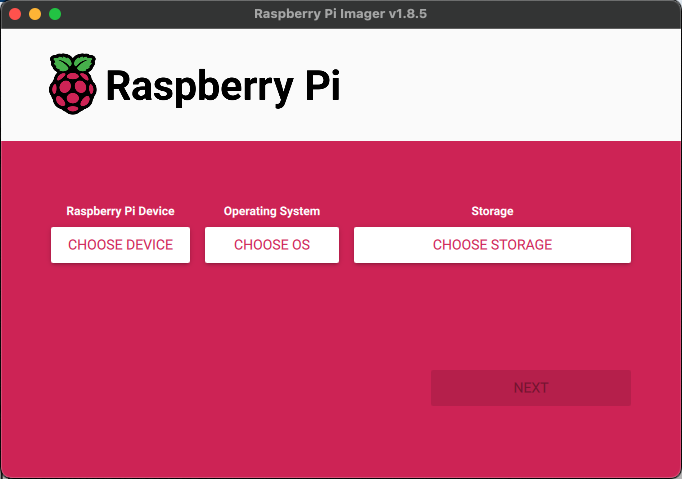
Using the Raspberry Pi Imager
- Repeat these steps for each SD Card or USB flash stick
- The opening screen will present you with
CHOOSE DEVICE|CHOOSE OS|CHOOSE STORAGE
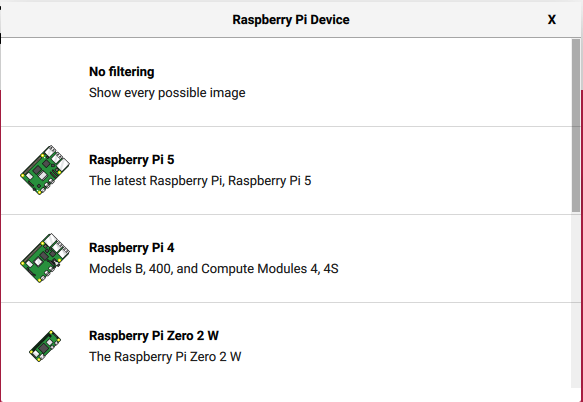
CHOOSE DEVICE
Choose Raspberry Pi4 models B, 400 and Compute Modules 4, 4s
CHOOSE OS
Choose Other general-purpose OS
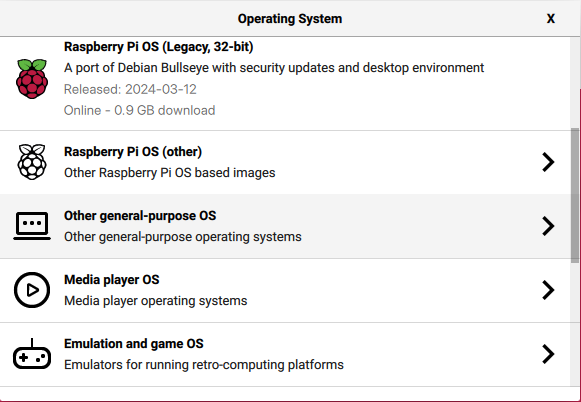
Choose Ubuntu
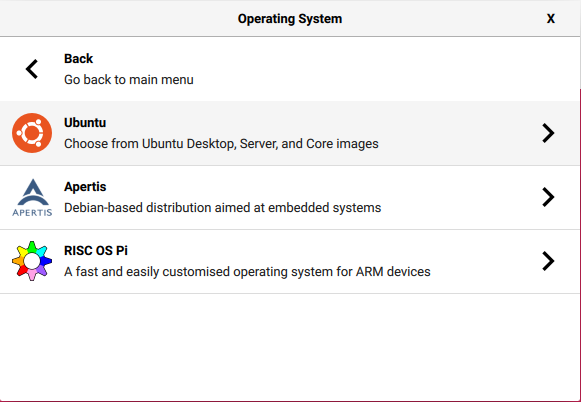
Choose Ubuntu Server 22.04.4 LTS (64-bit)

CHOOSE STORAGE
Note: This will look different on your machine especially if you are using either SD Card or USB flash drive

Next
OS Customisation
Use OS Customization by clicking: EDIT SETTINGS

- Fill in the required info according to your specifications.
- Remember to change the
HOSTNAMESpi01|pi02|pi03before each installation of Ubuntu on the SD Card - You can use whatever hostnames make sense to you
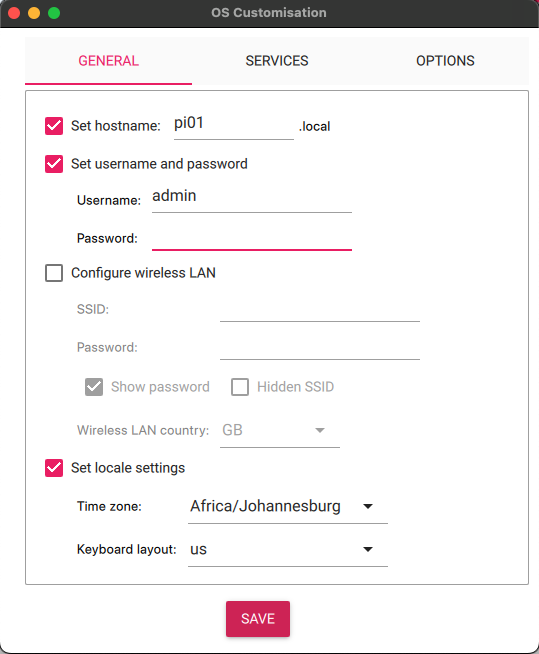
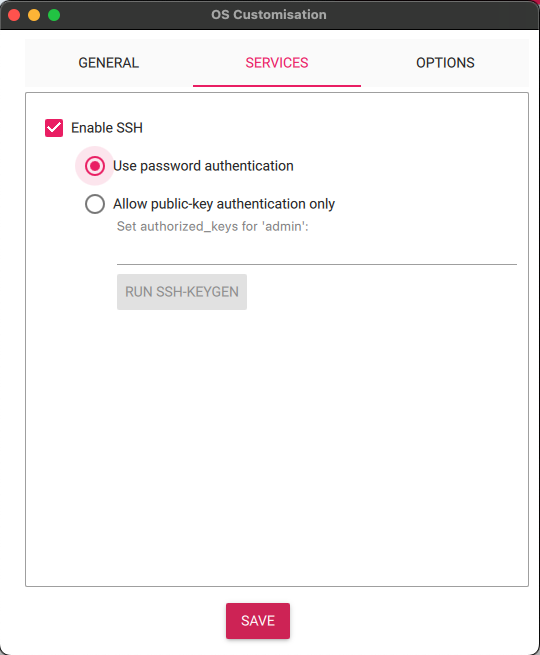
- If you decide to use
Allow public-key authentication onlywhich I would recommend you need to do some extra steps - Generate the keys in the home folder at this location
/Users/<your username>/.sshif you are using a Mac or Linux - Generate the keys in the home folder at this location
C:\Users\username\.sshif you are using Windows
ssh-keygen -t ed25519 -C "you-email@domain.com" -f <public key name>`
ssh-keygen -t ed25519 -C "i-love-aliens@ortelius.com" -f pi8s
- Then you will end up with two files, one being the
private keywhich you never ever share and the other will be thepublic key - Copy and paste the
public keybefore each installation of Ubuntu toAllow public-key authentication onlyfor each Pi - Then add this config to
.ssh/config
Host pi01.yourdomain.com
 HostName pi01.yourdomain.com
    AddKeysToAgent yes
 IdentityFile ~/.ssh/<private key name>
 User <your user>

Host pi02.yourdomain.com
 HostName pi02.yourdomain.com
    AddKeysToAgent yes
 IdentityFile ~/.ssh/<private key name>
 User <your user>

Host pi03.yourdomain.com
 HostName pi03.yourdomain.com
    AddKeysToAgent yes
    IdentityFile ~/.ssh/<private key name>
 User <your user>
-
This will allow SSH without a password onto each Pi like this
ssh -i ~/.ssh/<your private key name> <your pi username@<your private ip or domain name>for examplessh -i ~/.ssh/pis ortelius@pi01.pangarabbit.com -
You can also reference this document from Github for an alternative explanation
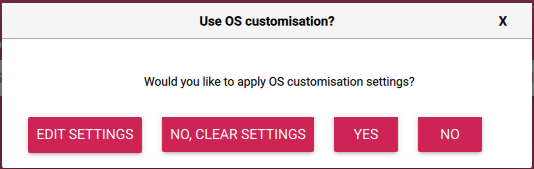
Check the boxes specific to your needs.
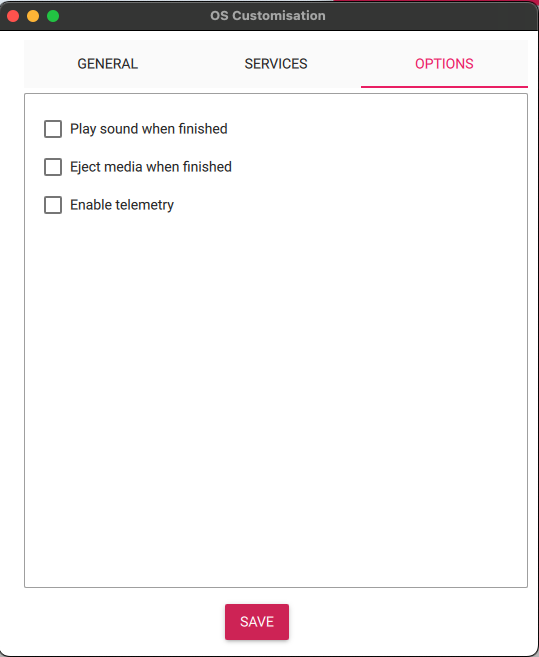
Click YES to apply the OS customisation settings
Rinse and repeat for each SD Card or USB flash stick.
- If all went well you should have 3 Pi 4B’s with Ubuntu installed
Conclusion
By this stage you should have three Pi 4 B’s running with Ubuntu 22.04.4 LTS each configured for SSH with a password or preferably a SSH private key and public key. Stay tuned for part 2 where we will dive into DHCP, NextDNS, NFS and install MicroK8s.
Next Steps
How to Bake on Ortelius Pi | Part 2 | The Preparation
