Ortelius Blog
Topics include Supply Chain Security, Microservice Management, Neat Tricks, and Contributor insights.
How to Bake an Ortelius Pi Part 2 | The Preparation
Introduction
In Part 1, of this series we installed Ubuntu Server 22.04.4 LTS on our Raspberry Pis.
In this follow-up blog, I will help you prepare three Pis for DHCP, DNS, NFS (Network File System) storage with a Synology NAS and install MicroK8s.
IP Addresses and DHCP
We need to give the Pis a home address so that they are contactable and this is where either a static IP addresse or DHCP comes in. Your home internet router generally comes with DHCP pre-configured. I use the tp-link | AX5400 Wi-Fi 6 Router and so I will use my router as the example here.
- Login to your home router with your browser and look for your DHCP configuration. Mine is
Network–>DHCP Server

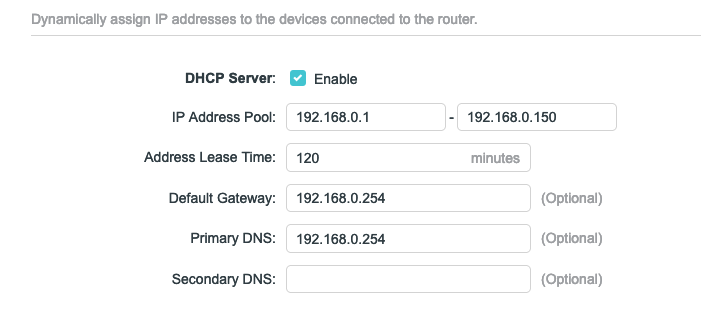
- Here you will see the IP pool range that your router is handing out to your device on your home network. I don’t want the entire range to be handed out as I need at least two static IP’s to be availble. One for the for the Metallb load balancer which will run in Kubernetes and one for the Synology NAS.
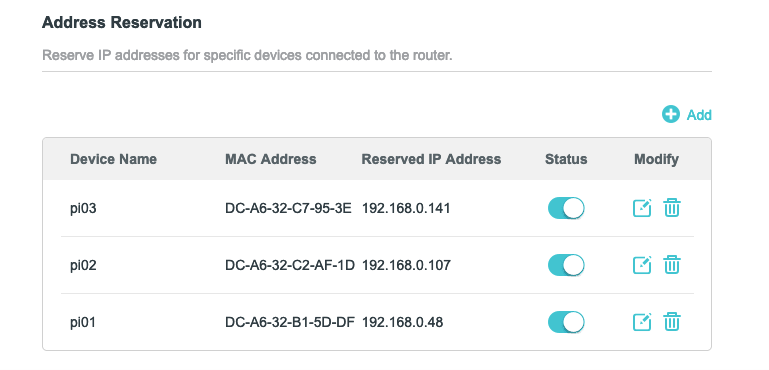
- My Pi’s have the following IPs which I have reserved with their mac addresses. You can get the mac addresses from the DHCP list of IPs handed out to your Pis. Reserving an IP entails instructing DHCP to consistently assign the same IP to specific devices, ensuring their stability and preventing allocation to other devices, effectively maintaining their static nature.
DNS
Local.gd
If you don’t have something like NextDNS or similar you can use local.gd which works very well and is very easy to setup.
A easy way to serve localhost is to use DNS that always resolves to 127.0.0.1. For example you could use ortelius.local.gd when developing locally and it will resolve to 127.0.0.1. Any subdomain like *.local.gd will work. The use of subdomains and sub-sub-domains work too as in the example below.
$ dig ortelius.local.gd
ortelius.local.gd.                  86400	IN	A	127.0.0.1

$ dig www.ortelius.local.gd
www.ortelius.local.gd.              86400	IN	A	127.0.0.1

$ dig aliens.are.real.ortelius.local.gd
aliens.are.real.ortelius.local.gd.       86400	IN	A	127.0.0.1

$ dig xrpl.local.gd
xrpl.local.gd.                 86400	IN	A	127.0.0.10.0.1
- Edit localhosts on Linux and Mac here with sudo rights
sudo vi /etc/hosts - Edit Windows localhosts file here as administrator
windows\System32\drivers\etc\hosts
NextDNS
For DNS I use NextDNS but this is not just DNS it is complete protection for all your devices no matter where you go in the world including your Pi MicroK8s nodes. It will use 127.0.0.1:53 to resolve your local IPs. However, you will need to do some configuration by logging into the NextDNS portal to add local DNS records and installing the cli.
Disclaimer - NextDNS is free up to 300 000 DNS queries once you reach that limit resolution stops. It is inexpensive and totally worth it.
- Think of a domain name for your environment - mine is pangarabbit.com.
- Go to the NextDNS Wiki here.
- Install the cli on each Pi and on your NAS so that you can SSH into your NAS and install NextDNS.
- Here is a doc on how to configure SSH for a Synology NAS.
sh -c 'sh -c "$(curl -sL https://nextdns.io/install)"'
- Run
sudo nextdns configto view your config. - Run
sudo nextdns config editto edit for each Pi and NAS and configure like this:
debug false
cache-size 10MB
max-ttl 5s
mdns all
cache-max-age 0s
use-hosts true
auto-activate true
listen localhost:53
profile <your profile id goes here>
log-queries false
report-client-info true
discovery-dns
hardened-privacy false
timeout 5s
setup-router false
control /var/run/nextdns.sock
detect-captive-portals false
bogus-priv true
max-inflight-requests 256
- Run
sudo nextdns restartto restart the service. - Run
sudo nextdns statusto check the service status. - Then in your NextDNS portal go to
Settings.

- Then scroll down to
Rewrites

- And add your private network DNS records like in this example for the Pis and your NAS
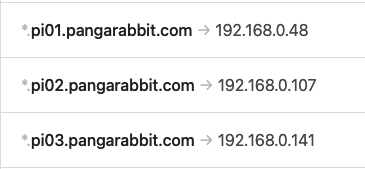

NextDNS will instantly auto refresh all your NextDNS agents with any configuration changes.
Great! DNS is done.
NFS Prep
- Synology
- What is network-attached storage (NAS)?
- What is NFS?
- I am using a
Synology DS413j with DSM 6.2.4-25556 Update 7so the following steps will be inline with my Synology.
Enable NFS on the Synology
- Login to the Synology and go to
File Services.
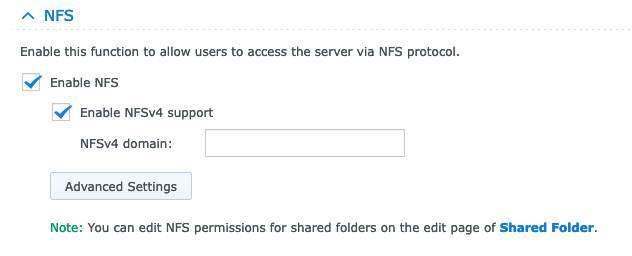
- On the
SMB/AFP/NFStab and scroll until you seeNFSandenable NFS and enable NFSv4 support.

Configure Shared Folder
- Go to
File Sharing
- Click
Create

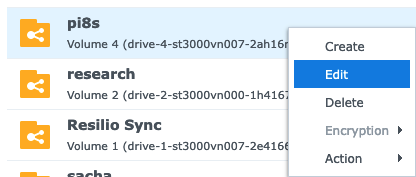
- Create a name for your folder share, I used
Pi8s.
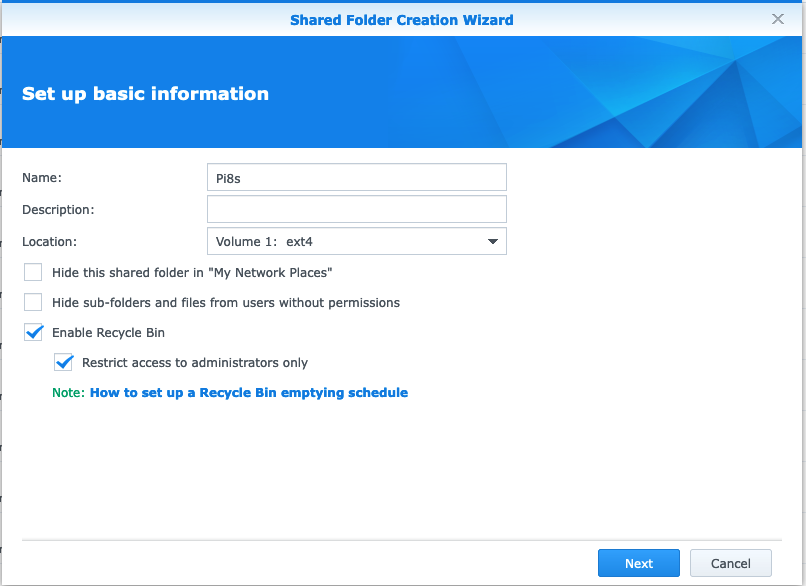
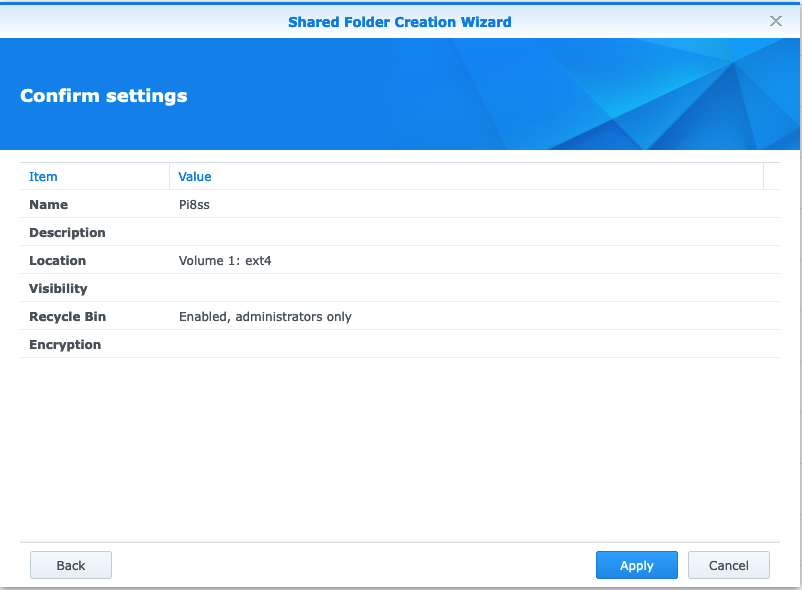
- Skip encryption.
- Apply your config.
- Right click your newly created
Shared Folderand selectEdit.
- Select
Permissionstab.

- Select
Local usersdrop down and give theadminRead/Writepermissions by checking the box.


- Select
NFS Permissionsand thenCreate.


- Configure like this then click
OK.
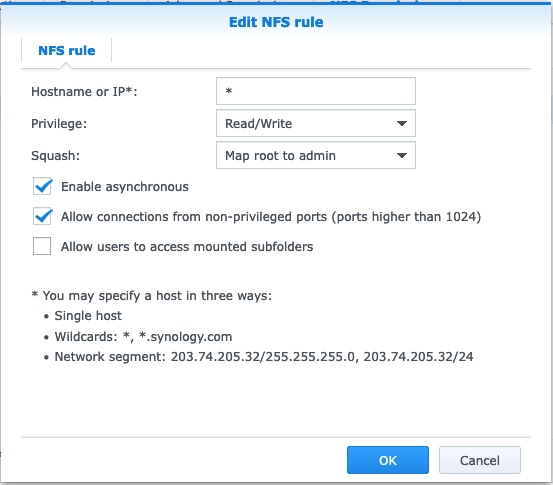
- Congrats you just configured the Synology for NFS!
OS Prep
Pis | Ubuntu Server 22.04.4 LTS
- Update all packages to the latest on each Pi with
sudo apt update -y && sudo apt upgrade -yand then go make coffee. - Install
sudo apt install nfs-common -yfor each Pi.
Kubectl | Your machine
- Kubectl docs here
- Kubectl quick reference here
- Install Kubectl here on
your local machine - Install and setup Kubectl on Mac here
- Install and setup Kubectl on Windows here
- Install and setup Kubectl on Linux here
Helm | Your machine
- Helm docs here
- Helm cheat sheet here
- Install Helm here on
your local machine - Install Helm with Homebrew package manager
brew install helmgenerally used on Mac - Install Helm with Chocolatey windows package manager
choco install kubernetes-helm
MicroK8s Prep
- MicroK8s docs here
- Microk8s on a Raspberry Pi
- Microk8s host interface configuration
- Microk8s multi-node cluster creation
FYIthere are commands related toKubectlsuch askubectl get nodeswhich are run from your machine.FYIthere are commands related toMickroK8ssuch assudo microk8s configwhich are run on the Pis where MicroK8s is installed.- Please find the MicroK8s command reference here.
- SSH into each Pi and configure the Pi BIOS
sudo vi /boot/firmware/cmdline.txtand add the followingcgroup_enable=memory cgroup_memory=1. - Below is the config from my Pi as an example:
cgroup_enable=memory cgroup_memory=1 console=serial0,115200 dwc_otg.lpm_enable=0 console=tty1 root=LABEL=writable rootfstype=ext4 rootwait fixrtc quiet splash.
- Install Kernel Modules
sudo apt install linux-modules-extra-raspi. - Referenced from here.
- Install Microk8s on each Pi.
sudo snap install microk8s --classic
- This installs the latest version of Microk8s.
Create highly available 3 node cluster with MicroK8s
MicroK8s uses Dqlite as a highly available SQLite database to store the Kubernetes logic without any configuration. In Canonicals own words High-availability SQLite Dqlite is a fast, embedded, persistent SQL database with Raft consensus that is perfect for fault-tolerant IoT and Edge devices.
- Choose a Pi to start the process, I used
pi01. - SSH onto
pi01and run this command onpi01.
sudo microk8s add-node
- You will need to run this
3 timeson the same node to generate a unique key for each node you wish to join. - This will return some joining instructions which should be executed on the MicroK8s instance that you wish to join to the cluster
(NOT THE NODE YOU RAN add-node FROM)<– Taken from Canonicals docs.
# EXAMPLE from Canonicals docs
From the node you wish to join to this cluster, run the following:
microk8s join 192.168.1.230:25000/92b2db237428470dc4fcfc4ebbd9dc81/2c0cb3284b05

Use the '--worker' flag to join a node as a worker not running the control plane, eg:
microk8s join 192.168.1.230:25000/92b2db237428470dc4fcfc4ebbd9dc81/2c0cb3284b05 --worker

If the node you are adding is not reachable through the default interface you can use one of the following:
microk8s join 192.168.1.230:25000/92b2db237428470dc4fcfc4ebbd9dc81/2c0cb3284b05
microk8s join 10.23.209.1:25000/92b2db237428470dc4fcfc4ebbd9dc81/2c0cb3284b05
microk8s join 172.17.0.1:25000/92b2db237428470dc4fcfc4ebbd9dc81/2c0cb3284b05
- Referenced from here
- On the same Pi run
sudo microk8s config. - This will return config you will need to access your Microk8s cluster.
- On your computer you will need to configure Kubectl by editing your
kube config. - My Kubectl configuration is here on my Mac
/Users/<username>/.kube/config.
- cluster:
    certificate-authority-data: <your certificate authority data goes here>.
    server: https://<your local network IP for your Pi goes here>:16443
  name: microk8s-cluster
- context:
    cluster: microk8s-cluster
    namespace: default
    user: <your user goes here>
  name: microk8s
users:
- name: <your user goes here>
  user:
    client-certificate-data: <your client certificate data goes here>
- Kubectl quick reference here
- Use Kubectl to connect to your cluster.
- To view your current kube config.
kubectl config view
- Get your available contexts.
kubectl config get-context
- Switch context to Microk8s.
kubectl config use-context microk8s
- Run the following to see all namespaces.
kubectl get ns
- Run the following to see all pods.
kubectl get pods --all-namespaces
- Well done you are now using your Microk8s Kubernetes cluster.
Conclusion
By this stage you should have three Pi’s each with NFS and MicroK8s. Stay tuned for Part 3 where we will deploy the NSF csi-driver-nfs for Kubernetes, deploy MetalLB load balancer, deploy Traefik and Ortelius.
Next Steps:
How to Bake an Ortelius Pi - Part 3 The Configuration
Disclaimer: Any brands I mention in this blog post series are not monetized. This is my home setup!
