Ortelius Blog
Topics include Supply Chain Security, Vulnerability Management, Neat Tricks, and Contributor insights.
How to Bake an Ortelius Pi Part 8 | OS Upgrades, Microk8s Upgrades and Adding Worker Nodes
- Introduction
- Raspberry Pi 5s
- Master Node Preparation Steps
- Deploy the worker nodes
- Microk8s Prep
- The Pi Nodes Stack
- Conclusion
Introduction
In part 7 we deployed Netdata and explored deploying Netdata to gain valuable insights into our cloud infrastracture.
In part 8 I will discuss how I upgraded my cluster from a 3 node Kubernetes cluster to a 6 node Kubernetes cluster by incorporating 3 Pi 5s as worker nodes. My goal with this entire series and project is to emulate as close as possible what an enterprise platform would look like using various solutions and what Ortelius can do once deployed in your cloud infrastructure. My focus is always to empower, sharpen other humans and do my best to break down complexity whilst being resourceful. A monumental task in itself.
Raspberry Pi 5s
The new Raspberry Pi 5 comes with greater processing power, substantially upgraded graphics performance which should really help with MLOP’s workloads when deploying your self-hosted platform (yet to test this thou) and USB C.
Features
- Processor Broadcom BCM2712 2.4GHz quad-core 64-bit Arm Cortex-A76 CPU, with cryptography extensions, 512KB per-core L2 caches, and a 2MB shared L3 cache
- VideoCore VII GPU, supporting OpenGL ES 3.1, Vulkan 1.2
- Dual 4Kp60 HDMI® display output with HDR support
- 4Kp60 HEVC decoder
- LPDDR4X-4267 SDRAM (4GB and 8GB SKUs available at launch)
- Dual-band 802.11ac Wi-Fi®
- Bluetooth 5.0 / Bluetooth Low Energy (BLE)
- microSD card slot, with support for high-speed SDR104 mode
- 2 × USB 3.0 ports, supporting simultaneous 5Gbps operation
- 2 × USB 2.0 ports
- Gigabit Ethernet, with PoE+ support (requires separate PoE+ HAT)
- 2 × 4-lane MIPI camera/display transceivers
- PCIe 2.0 x1 interface for fast peripherals (requires separate M.2 HAT or other adapter)
- 5V/5A DC power via USB-C, with Power Delivery support
- Raspberry Pi standard 40-pin header
- Real-time clock (RTC), powered from external battery
- Power button
For a more in depth coverage go to this URL
Storage
For storage I opted for the Samsung EVO Plus 128GB MicroSD Card which would host Ubuntu 24.04.1 LTS Noble Numbat and for consolidated centralised storage I got 3 Western Digital My Passport 2TB USB 3 disks for each worker Pi which I will cover in another blog on how to use software defined storage to present them as a single block of storage to Kubernetes.
Master Node Preparation Steps
Upgrading Microk8s
- This is a good time to perform maintenance before you add the worker nodes and is a lengthy process
- Do one node at a time
- SSH onto each Pi and run the following commands
Microk8s drain
- Draining a node migrates workloads to the other nodes
# cordons the node preventing workloads from being scheduled on the node
microk8s kubectl drain <node name> --ignore-daemonsets --delete-emptydir-data
- Once that is done upgrade Microk8s on that node
# You will need to change the channel version to the latest version at the time
sudo snap refresh microk8s --channel <latest version>/candidate
# sudo snap refresh microk8s --channel 1.31.1/candidate
- Restart the node
sudo reboot
Microk8s uncordon
- SSH onto the rebooted node and uncordon that node to schedule workloads on that node
# Uncordon tells Kubernetes that this node can be used to schedule workloads
microk8s kubectl uncordon <node name>
# microk8s kubectl uncordon pi01
- This command will show you the state of each node
kubectl get nodes
NAME   STATUS                     ROLES    AGE   VERSION   INTERNAL-IP     EXTERNAL-IP   OS-IMAGE             KERNEL-VERSION     CONTAINER-RUNTIME
pi04   Ready                      <none>   9d    v1.31.1   192.168.0.149   <none>        Ubuntu 24.04.1 LTS   6.8.0-1013-raspi   containerd://1.6.28
pi05   Ready                      <none>   9d    v1.31.1   192.168.0.115   <none>        Ubuntu 24.04.1 LTS   6.8.0-1013-raspi   containerd://1.6.28
pi06   Ready                      <none>   9d    v1.31.1   192.168.0.23    <none>        Ubuntu 24.04.1 LTS   6.8.0-1013-raspi   containerd://1.6.28
Upgrading Ubuntu
- Then upgrade Ubuntu with the following steps
- Do one node at a time
- Follow the prompts
# Update Current System: Ensure your current installation is fully updated and old packages are cleaned out
sudo apt update && sudo apt upgrade -y && sudo apt autoremove -y
# Begin the Upgrade: do-release-upgrade will manage the upgrade smoothly and interactively.
sudo do-release-upgrade -d
Rinse and repeat for each SD Card or USB flash stick
Deploy the worker nodes
Right lets deploy those worker nodes by preparing our Raspberry Pi 5’s using a similar process from part01.
Using the Raspberry Pi Imager
- Repeat these steps for each SD Card
- The opening screen will present you with
CHOOSE DEVICE|CHOOSE OS|CHOOSE STORAGE
CHOOSE DEVICE
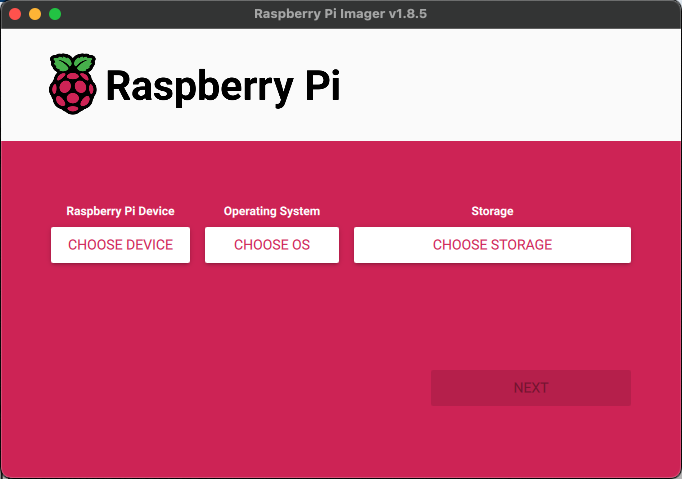
Choose Raspberry Pi5
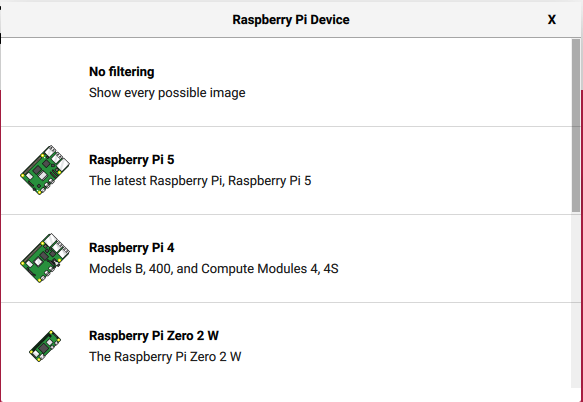
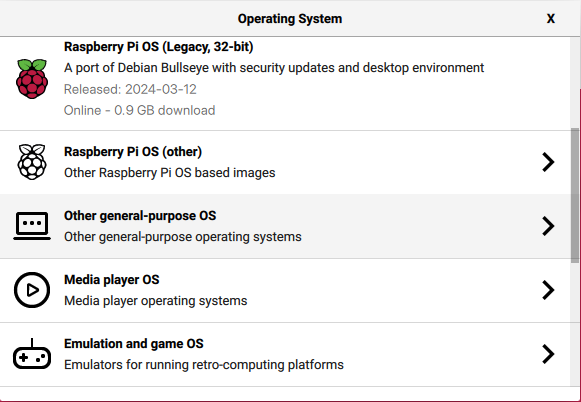
CHOOSE OS
Choose Other general-purpose OS
Choose Ubuntu
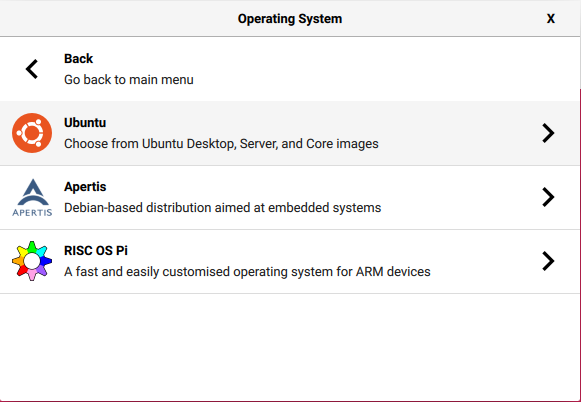
Choose Ubuntu Server 24.04.1 LTS (64-bit)

CHOOSE STORAGE
Note: This will look different on your machine

Next
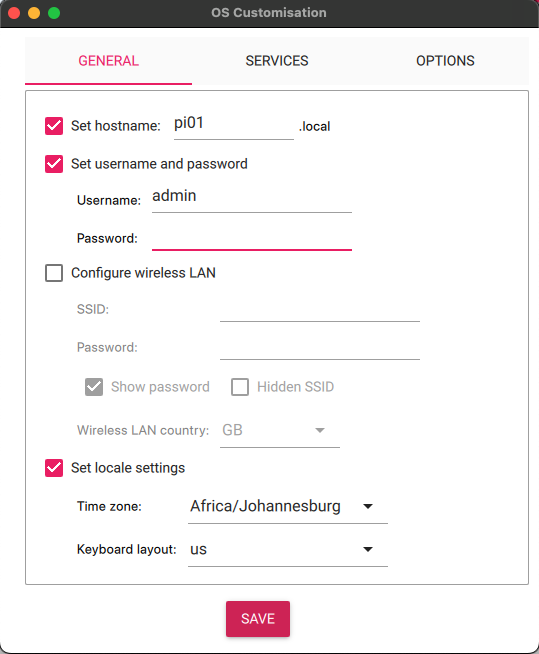
OS CUSTOMISATION
Use OS Customization by clicking: EDIT SETTINGS

Fill in the required info according to your specifications.
Remember to change the HOSTNAMES pi04 | pi05 | pi06 before each installation of Ubuntu on the SD Card
(You can use whatever hostnames make sense to you)
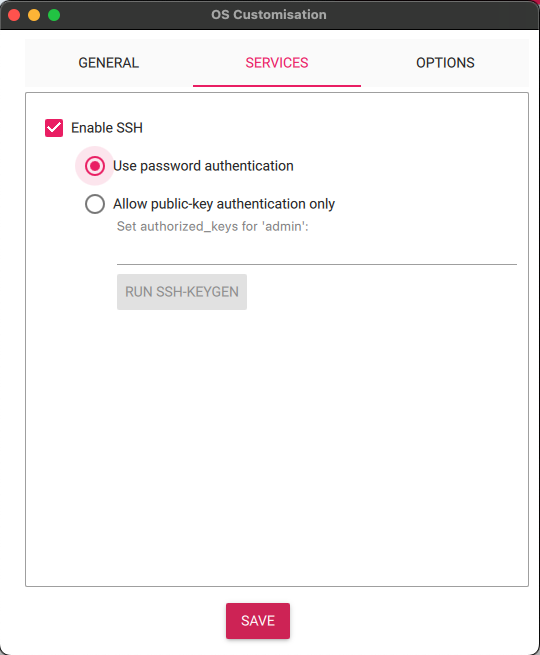
- If you decide to use
Allow public-key authentication onlywhich I would recommend you need to do some extra steps - Add the same public key you generated in part01to each new worker node
- If you are using a Mac or Linux you will find public key marked with a
.pubextension here/Users/<your username>/.ssh - If you are using Windows you will find the public key marked with a
.pubextension hereC:\Users\username\.ssh - Copy the public key each time you perform an install on the SD Card to
Allow public-key authentication only - Append this config to
.ssh/config
Host pi04.yourdomain.com
 HostName pi04.yourdomain.com
    AddKeysToAgent yes
 IdentityFile ~/.ssh/<private key name>
 User <your user>

Host pi05.yourdomain.com
 HostName pi05.yourdomain.com
    AddKeysToAgent yes
 IdentityFile ~/.ssh/<private key name>
 User <your user>

Host pi06.yourdomain.com
 HostName pi06.yourdomain.com
    AddKeysToAgent yes
    IdentityFile ~/.ssh/<private key name>
 User <your user>
-
This will allow SSH without a password onto each Pi like this
ssh -i ~/.ssh/<your private key name> <your pi username@<your private ip or domain name>for examplessh -i ~/.ssh/pis ortelius@pi04.pangarabbit.com -
You can also reference this document from Github for an alternative explanation
Check the boxes specific to your needs.
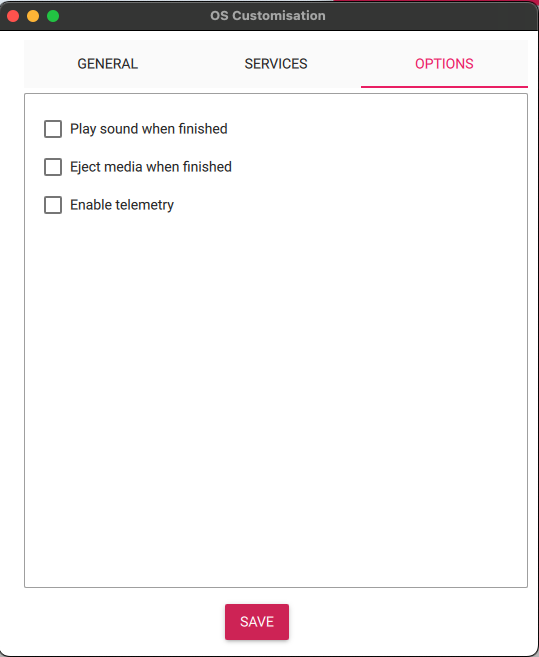
Click YES to apply the OS customisation settings

Rinse and repeat for each SD Card or USB flash stick
- If all went well you should have 3 Pi 5’s with Ubuntu installed
IP Addresses and DHCP
- Your new worker nodes should have been assigned IP addresess from the DHCP server
- Remember to reserve these
- Refer to part 2 for a refresher
DNS Configuration
- Don’t forget to configure DNS by adding your new nodes like we did in part 2
Microk8s Prep
- MicroK8s docs here
- Microk8s on a Raspberry Pi
- Microk8s host interface configuration
- Microk8s multi-node cluster creation
- Please find the MicroK8s command reference here
- Kubectl quick reference here
FYIthere are commands related toKubectlsuch askubectl get nodeswhich are run from your machineFYIthere are commands related toMickroK8ssuch assudo microk8s configwhich are run on the Pis where MicroK8s is installed
Installing Microk8s
- On each node create a folder in your user home directory
mkdir ~/.kube
- SSH into each Pi and configure the Pi BIOS
sudo vi /boot/firmware/cmdline.txtand add the followingcgroup_enable=memory cgroup_memory=1 - Below is the config from my Pi as an example
cgroup_enable=memory cgroup_memory=1 console=serial0,115200 dwc_otg.lpm_enable=0 console=tty1 root=LABEL=writable rootfstype=ext4 rootwait fixrtc quiet splash
- Install Kernel Modules
sudo apt install linux-modules-extra-raspi - Referenced from here
- I like to use the latest stable version
# Installs Microk8s, sets permissions and ownership to the current user on the .kube directory
sudo snap install microk8s --classic --channel=1.31/stable && sudo usermod -a -G microk8s $USER && sudo chown -f -R $USER ~/.kube
Joining your worker nodes to the cluster
- Choose a Pi to start the process, I used
pi04 - SSH onto
pi04and run this command onpi04
sudo microk8s add-node
- You will need to do this
3 timeson the same node and each time you will need to copy the uniquejoin instruction with the unique keyfor each node you wish to join - This will return some joining instructions which should be executed on the MicroK8s instance that you wish to join to the cluster
(NOT THE NODE YOU RAN add-node FROM) - Make sure you add the
--workerflag as these are not to be joined as master nodes
# Example from Canonicals docs
Use the '--worker' flag to join a node as a worker not running the control plane, eg:
microk8s join 192.168.1.230:25000/92b2db237428470dc4fcfc4ebbd9dc81/2c0cb3284b05 --worker
Rinse and repeat for each node
Microk8s drain to move workloads to the worker nodes
- If are adding worker nodes we want to emulate a enterprise thus we do not want workloads running on our master nodes so we will corden them by performing the drain command again so that workloads cannot be placed on them
- Only drain the master nodes which will be the first 3 nodes you installed
# cordons the node preventing workloads from being scheduled on the node
microk8s kubectl drain <node name> --ignore-daemonsets --delete-emptydir-data
# microk8s kubectl drain pi01 --ignore-daemonsets --delete-emptydir-data
- Run the following to see your new nodes and the master nodes will have
SchedulingDisabled
kubectl get nodes
NAME   STATUS                     ROLES    AGE   VERSION   INTERNAL-IP     EXTERNAL-IP   OS-IMAGE             KERNEL-VERSION     CONTAINER-RUNTIME
pi01   Ready,SchedulingDisabled   <none>   85d   v1.31.1   192.168.0.48    <none>        Ubuntu 24.04.1 LTS   6.8.0-1013-raspi   containerd://1.6.28
pi02   Ready,SchedulingDisabled   <none>   85d   v1.31.1   192.168.0.107   <none>        Ubuntu 24.04.1 LTS   6.8.0-1013-raspi   containerd://1.6.28
pi03   Ready,SchedulingDisabled   <none>   85d   v1.31.1   192.168.0.141   <none>        Ubuntu 24.04.1 LTS   6.8.0-1013-raspi   containerd://1.6.28
pi04   Ready                      <none>   9d    v1.31.1   192.168.0.149   <none>        Ubuntu 24.04.1 LTS   6.8.0-1013-raspi   containerd://1.6.28
pi05   Ready                      <none>   9d    v1.31.1   192.168.0.115   <none>        Ubuntu 24.04.1 LTS   6.8.0-1013-raspi   containerd://1.6.28
pi06   Ready                      <none>   9d    v1.31.1   192.168.0.23    <none>        Ubuntu 24.04.1 LTS   6.8.0-1013-raspi   containerd://1.6.28
FYI make sure you backup your persistent volumes on the NFS server
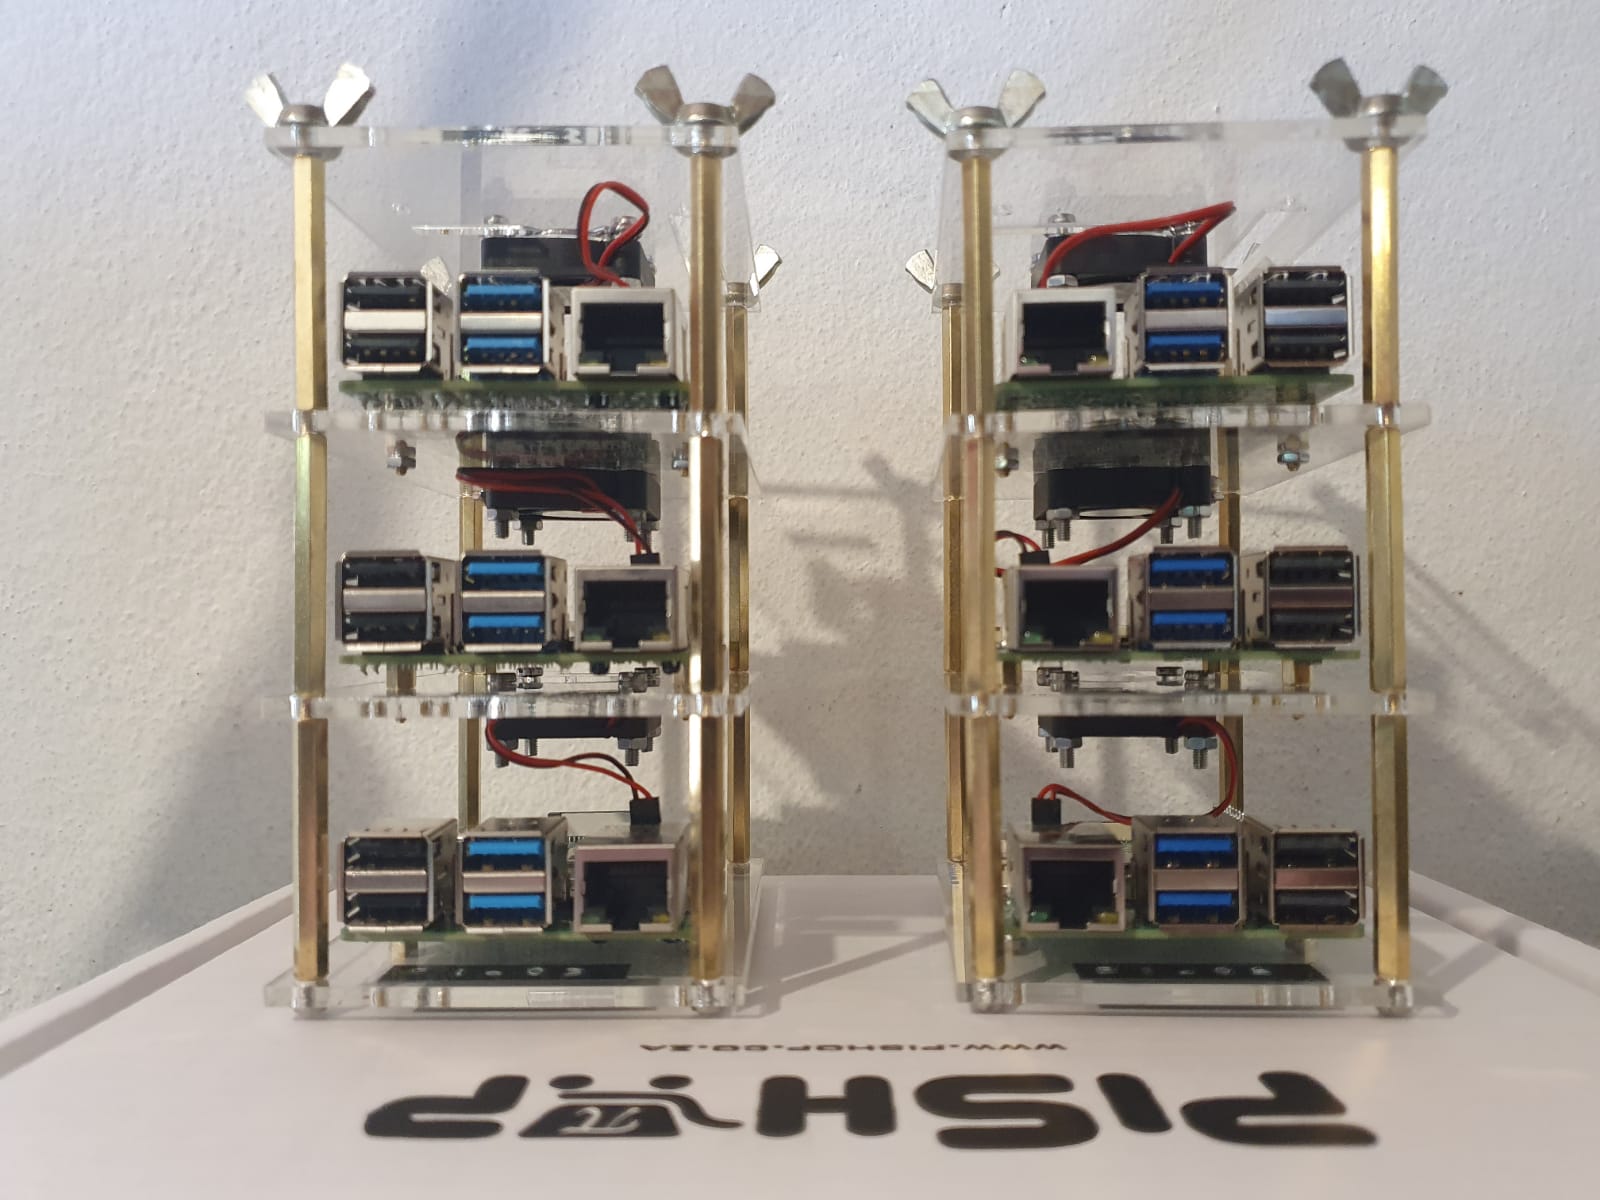
The Pi Nodes Stack
Conclusion
You now have a 6 node Microk8s Kubernetes 1.31.1 cluster with 3 master nodes, 3 worker nodes all running Ubuntu 24.04.1 LTS Noble Numbat. Your master nodes can focus on Kubernetes logic and your worker nodes can focus on your applications and infrastructure workloads.
Happy alien hunting…..
